In the previous installment of this epic saga, we started reassembling the axle that will be going underneath a 1996 Buick Roadmaster. In case you've forgotten the point of this exercise - and you'd be forgiven, as the scope of this project has suffered mightily from feature creep - we're trying to replace the stock rear drum brakes, worn-out limited slip, and way-too-steep 2.56:1 gears with the discs and 3.08s from an Impala SS.
With the housing freshly painted, new bearings and seals installed, and the carrier secured in place, it's time to button this thing up by installing the axle shafts and brakes.
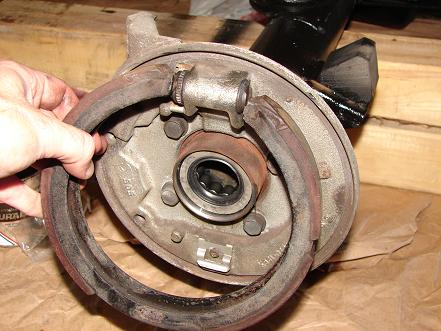
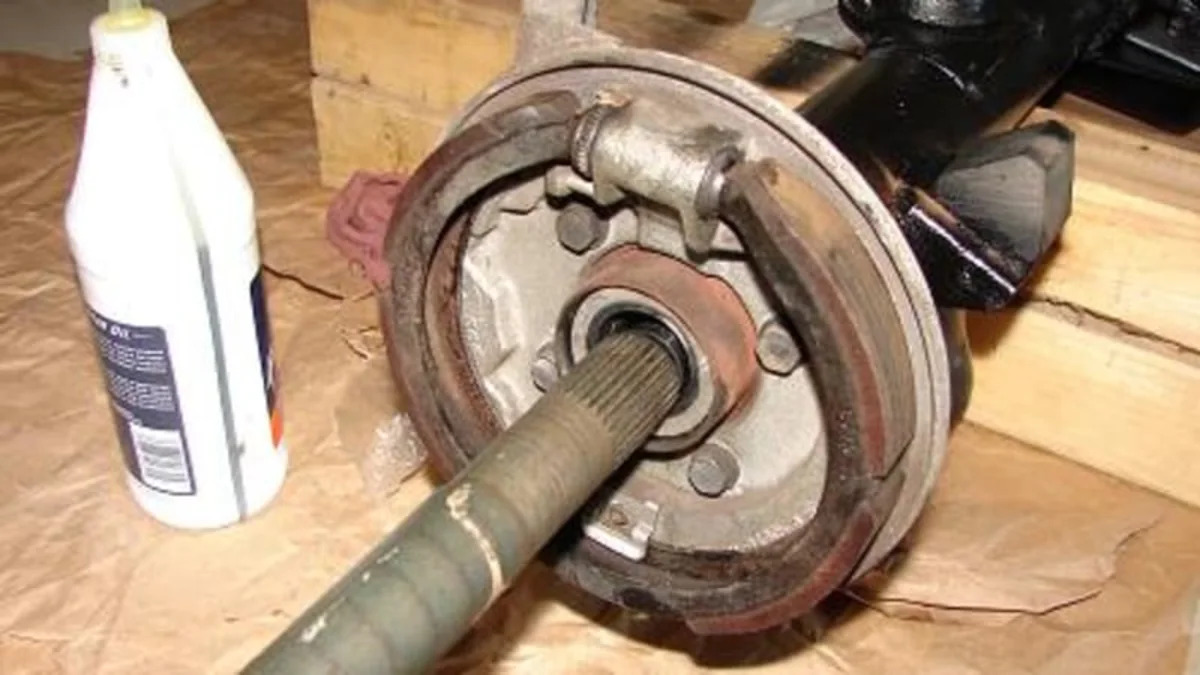
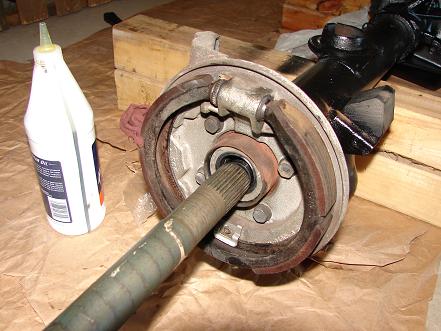
Reinstalling the parking brake system was the first task. The existing adjusters were disassembled, cleaned with solvent, and then packed full with fresh bearing grease. The drum-in-hat parking brake pads were then sprayed down with brake cleaner and clipped in place.
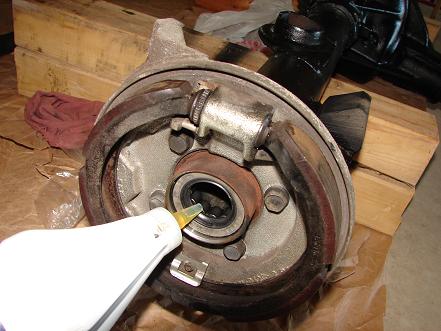
A bit of axle lube was applied to the previously dry axle bearings to protect them during the first use.
The axle shafts were then slid into place, being particularly careful not to drag it across the fresh axle seal.
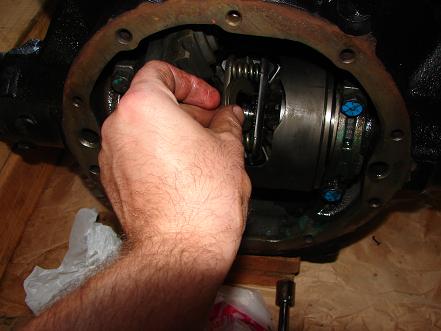
With the axle shafts inserted, the C-clip retainers were slid into the corresponding groove in the axle. Dropping these into place in a limited slip can be a bit tricky, but a bit of patience and they'll eventually find their way home.
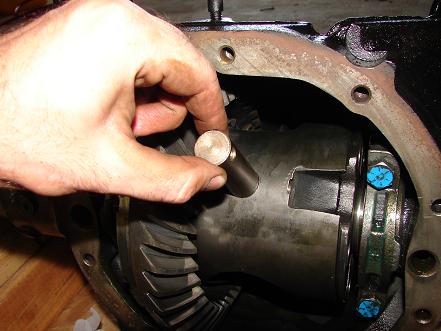
After giving the axle shafts a tug outwards to seat the C-clips into the side gears, the spider gear pin is dropped into place. This not only gives the spider gears somewhere to spin, but also acts as a thrust surface for the axle shafts.
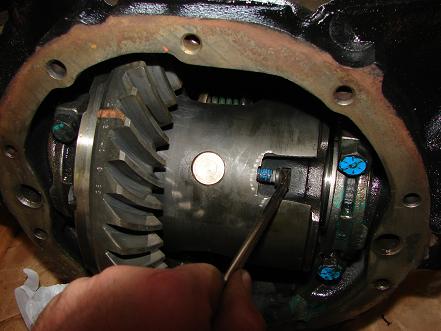
The retaining bolt for the pin is coated with the appropriate removable thread locking compound (in this case, blue Loctite), and snugged securely.
Surely a torque spec exists for this fastener, but damned if we've ever figured out how to fit a socket and bulky torque wrench into this spot. Applying about as much force as possible with one hand to a standard-length 5/16" combination wrench has always done the trick. Regardless of how it's done, just make sure this bolt is tight, as it's rather critical to keeping things where they should be.
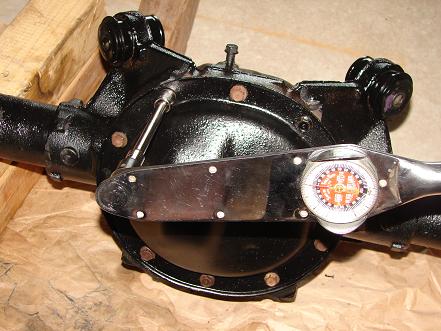
The rear cover can now be installed with a fresh gasket and a thin coating of RTV (silicone sealant), and torqued to spec.
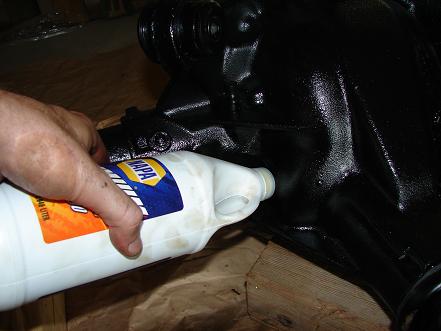
This is a great time to fill the differential, as it's far easier to access the fill hole now than when the axle is under the vehicle. Just make sure that the axle is level. A bit less than three quarts were added before the lube started to run back out from the fill hole, at which point we put a bit of Teflon pipe sealer to the fill plug and snugged it up.
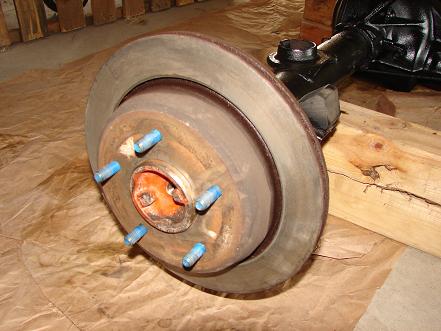
The cleaned-up brake discs were wiped down with brake solvent and installed over the axle shafts. At this point, we spent a few moments with the parking brake adjusters. The factory service manual calls for a Kent-Moore tool to measure the inside diameter of the drums and transfer that measurement over to the parking brake pads, but of course we didn't have one of those laying around the shop. Instead, we just cranked on the adjuster until we got a bit of drag on the parking brakes, and then backed it off about a half-turn so that the axle spun freely.
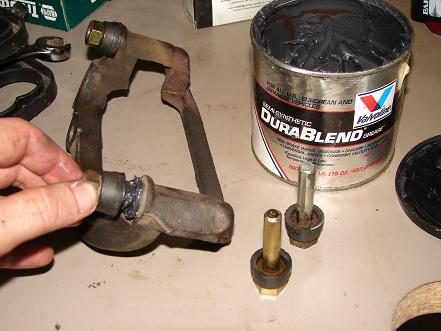
The brake slider pins on these axles are notorious for seizing, so make sure that the pins and brackets are cleaned of any grunge, and then pack the slider pin holes full of a high-quality grease. If the rubber boots are damaged, replace them.
One of the slider pins had broken off in the bracket during disassembly, and so we spent an hour making a fixture to clamp it in a mill such that we could drill out the remaining portion of the pin. That made a lot of sense to save a part that costs $70 at the dealer; however, we later found out that an aftermarket replacement is now available for about $20 at AutoZone.
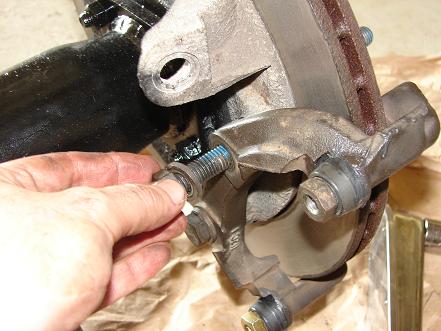
Secure the brackets to the backing plates. Since these bolts are rather short, it's important to apply the required tightening torque or else they're likely to back out at an inconvenient time. Applying removable threadlocker is also a must; alternatively, new bolts can be purchased at the dealer that have a threadlocking compound pre-applied.
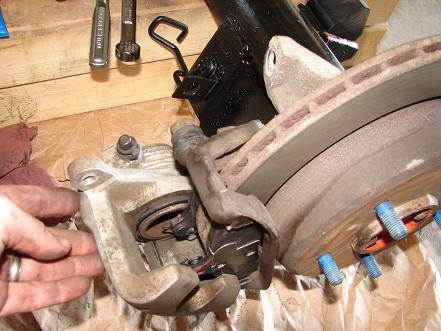
The pads are then cleaned with solvent and placed in the caliper bracket, and the caliper is secured in position. Make sure to get the correct caliper on each side; they're identical other than the orientation of the bleeder screw (it should face upwards).
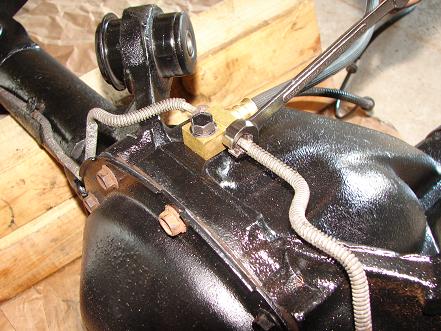
A new center brake line is installed along with the steel lines that came with the axle.
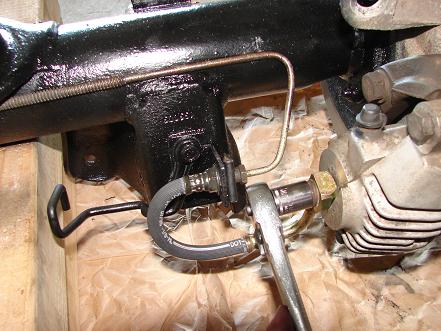
We also threw on a set of new lines at the calipers. When routing these lines, make sure the loop goes downwards. While this may appear to put it in a vulnerable location (it's actually well-protected by the shock bracket), it's also necessary to keep from creating a high point in the braking system that could trap air and making bleeding the brakes rather difficult.
With the "banjo bolt" style of line, make sure to get an aluminum crush washer on both sides of the banjo fitting. It's also a good idea to use fresh washers each time the line is re-installed.
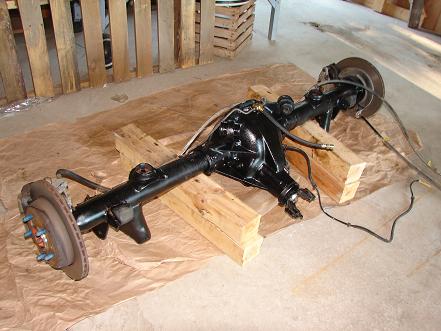
And that now wraps up the reassembly of this 10-bolt rear axle. In the next segment, we'll wrestle out the old axle, which will likely involve a lot of cursing as we struggle with 10-year-old rusty fasteners.

Sign in to post
Please sign in to leave a comment.
Continue